📬 ¿Sugerencias?Si tienes dudas o quieres que cubra algún tema, escríbeme.
#calibración
Calibración XYZ: El viaje de 21 cubos
13 Julio 20268 min lecturaKlipper · Rotation Distance · OrcaSlicer
📢 Anuncio — configurar en AdSense
When you set up a 3D printer for the first time — or switch firmware to Klipper —
one of the first things you learn is that 30mm printed ≠ 30mm real.
And that's where the calibration dance begins.
This post documents my process for calibrating rotation_distance
in Klipper using the calibration cube method. 21 cubes later, I hit millimeter precision.
Along the way, I discovered a nasty axis mapping trap — and it cost me days of confusion.
The starting point
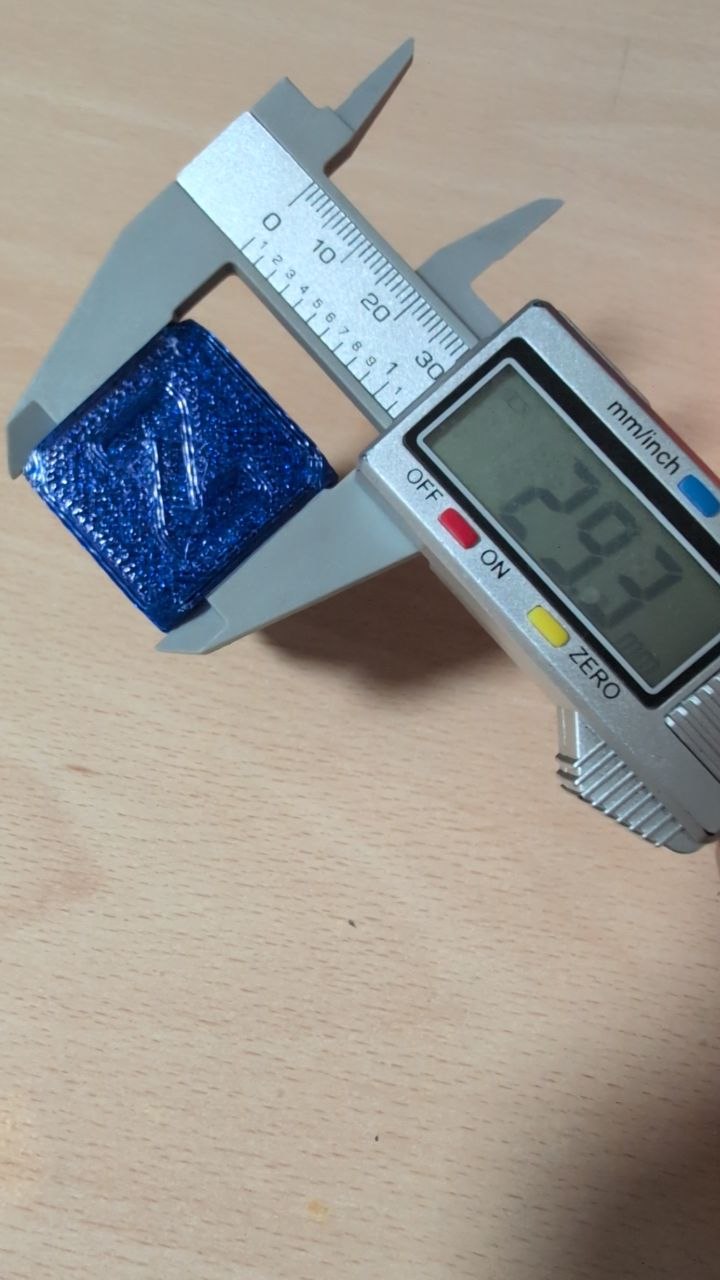
My first calibration cube measured 29.5mm on the X axis instead of 30mm.
The caliper doesn't lie:
29.5mm — the first cube. Slightly undersized, but a clear starting point.
A ~1.7% deviation doesn't sound huge, but in 3D printing these errors compound.
Parts won't fit together, holes won't align, tolerances go out the window.
The formula
Klipper uses rotation_distance to know how much the axis moves per motor revolution.
When the cube is smaller than expected, you need to decrease it:
⚠ Common mistake: If the cube measures smaller, rotation_distance should be smaller too. Intuition suggests the opposite, but the formula is clear.
🔍 My first try: I actually did the opposite — 32 × (30 / 29.5) = 32.54. The cube came out even smaller (29.4mm). Wrong direction entirely. The correct formula is old × (actual / expected), not old × (expected / actual).
The OrcaSlicer axis trap
Here's where things got interesting. After 5 cubes I noticed something weird:
the X axis on the printer wasn't matching what OrcaSlicer showed.
I was printing a cube that should have been 30mm on X according to the slicer,
but the printer was moving the Y axis instead. OrcaSlicer's X axis
was the printer's Y axis, and vice versa.
🔍 What happened: When you define your printer in OrcaSlicer,
the bed orientation matters. If your printer's bed is "portrait" (Y is the long axis)
but OrcaSlicer expects "landscape", the axes get swapped.
The cube comes out rotated, and you end up calibrating the wrong axis.
I spent two days calibrating the X axis to perfection — only to realize
I was actually adjusting the Y belt tension. The fix was simple:
swap the axis mapping in the printer profile:
# Before (wrong — axes swapped)
# OrcaSlicer X → printer Y
# OrcaSlicer Y → printer X

# After (correct)
# Match the bed orientation in OrcaSlicer with your actual printer
# In my case: bed_custom_orientation = True + swapped coordinates
Once I fixed the mapping, the calibration started making sense.
The 29.5mm reading was actually on the real X axis — and I could finally
calibrate properly.
21 iterations
Calibration isn't a one-shot deal. Each firmware change slightly shifts
the machine's behavior. My process:
Print a 20×20×20mm cube (2 walls, 15% infill)
Wait ~25 minutes
Measure with digital caliper on X, Y, Z
Apply the formula for each axis
Updateprinter.cfg and restart Klipper
Repeat until all three axes read 20.00mm ±0.05mm
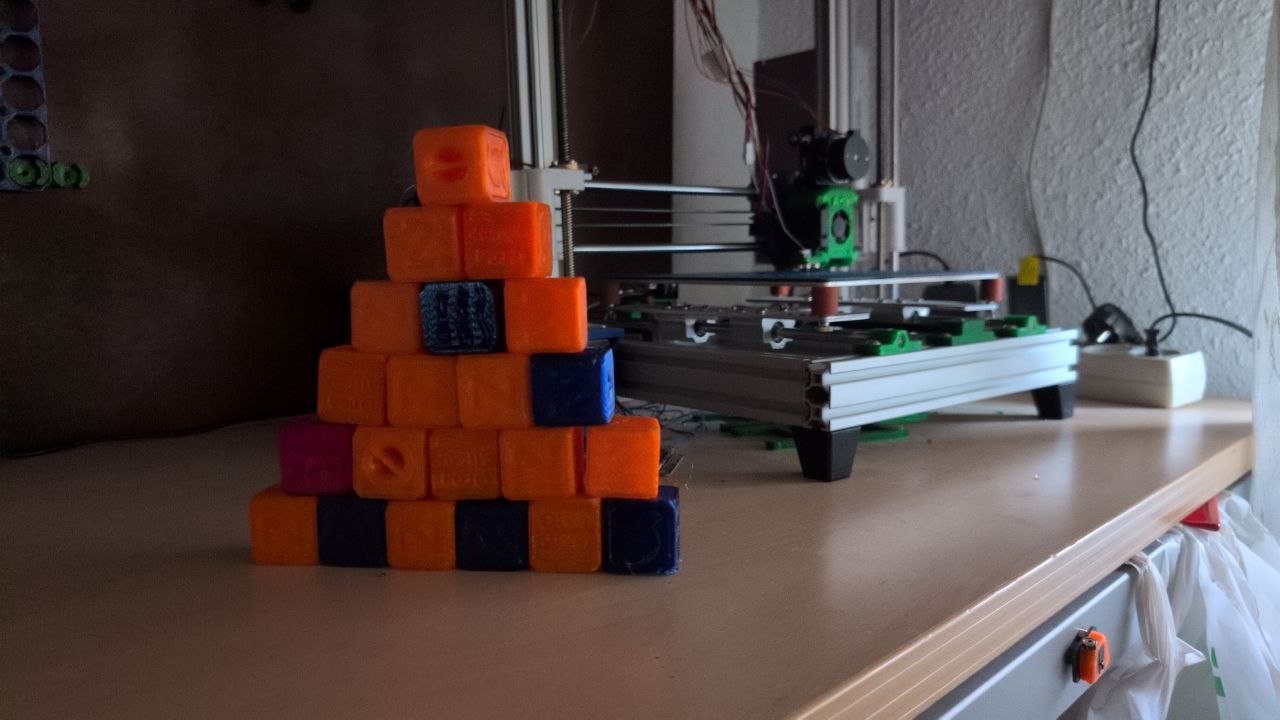
I did this 21 times. Each cube represents one iteration.
Some were big adjustments (rd went as low as 38.5), others were micro-corrections
of tenths of a millimeter.
21 cubes, 21 iterations. Each color is a different attempt.
The tower of cubes is my visual reminder that 3D printing is
iterative. It doesn't come out perfect on the first try,
but each attempt gets you closer. And stacking them on the desk?
Strangely satisfying.
Check your axis mapping first. Before printing a single cube, verify that OrcaSlicer axes match your printer. Print a simple arrow to confirm.
Never trust the first cube. Always print at least 2 to confirm.
Measure at the same spot. Center of each face for consistency.
A digital caliper is essential. Best 15€ investment.
Document every iteration. Old rd, measured value, new rd. You'll lose count otherwise.
Patience pays. 21 cubes seem like a lot, but now every part comes out dimensionally correct from the first layer.
💡 Tip: Keep a calibration cube handy. If something changes (nozzle swap, belt tension, temperature), print one and you'll know instantly if recalibration is needed.
Cuando montas una impresora 3D por primera vez —o cambias el firmware a Klipper—
una de las primeras cosas que descubres es que 30mm impresos no siempre son 30mm reales.
Y ahí empieza el baile de la calibración.
Este post documenta mi proceso para calibrar el rotation_distance
en Klipper usando el método del cubo de calibración. 21 cubos después conseguí precisión milimétrica.
Por el camino descubrí una trampa de ejes que me costó días de confusión.
El punto de partida
Mi primer cubo de calibración medía 29.5mm en el eje X
en lugar de 30mm. El pie de rey no miente:
29.5mm — el primer cubo. Un poco pequeño, pero un punto de partida claro.
Un ~1.7% de desviación no parece mucho, pero en impresión 3D estos errores se acumulan.
Las piezas no encajan, los agujeros no alinean, las tolerancias se van al traste.
La fórmula mágica
Klipper usa rotation_distance para saber cuánto se mueve el eje por revolución del motor.
Cuando el cubo mide menos de lo esperado, hay que reducir el valor:
⚠ Error común: Si el cubo mide menos, el rotation_distance debe ser más pequeño. La intuición dice lo contrario, pero la fórmula lo deja claro.
🔍 Mi primer intento: Hice lo contrario — 32 × (30 / 29.5) = 32.54. El cubo salió aún más pequeño (29.4mm). Dirección completamente equivocada. La fórmula correcta es old × (real / esperado), no al revés.
La trampa de ejes de OrcaSlicer
Aquí es donde se puso interesante. Después de 5 cubos noté algo raro:
el eje X de la impresora no coincidía con lo que mostraba OrcaSlicer.
Estaba imprimiendo un cubo que según el slicer medía 30mm en X,
pero la impresora movía el eje Y en su lugar. El eje X de OrcaSlicer
era el eje Y de la impresora, y viceversa.
🔍 Qué pasó: Al definir la impresora en OrcaSlicer, la orientación de la cama importa.
Si tu cama es "vertical" (Y es el eje largo) pero OrcaSlicer espera "horizontal",
los ejes se intercambian. El cubo sale rotado y terminas calibrando el eje equivocado.
Estuve dos días calibrando el eje X a la perfección — solo para descubrir
que estaba ajustando la tensión de la correa Y. La solución fue simple:
intercambiar el mapeo de ejes en el perfil de la impresora:
# Antes (mal — ejes intercambiados)
# OrcaSlicer X → impresora Y
# OrcaSlicer Y → impresora X

# Después (bien)
# Coincide la orientación de la cama en OrcaSlicer con la impresora real
# En mi caso: bed_custom_orientation = True + coordenadas intercambiadas
Una vez arreglado el mapeo, la calibración empezó a tener sentido.
El 29.5mm era en el eje X real — y por fin pude calibrar correctamente.
21 iteraciones
La calibración no se hace una vez y ya. Cada ajuste en el firmware cambia
ligeramente el comportamiento. Mi proceso:
Imprimir cubo 20×20×20mm (2 paredes, 15% infill)
Esperar ≈25 minutos
Medir con pie de rey en X, Y, Z
Aplicar la fórmula para cada eje
Actualizarprinter.cfg y reiniciar Klipper
Repetir hasta que los tres ejes den 20.00mm ±0.05mm
Esto lo hice 21 veces. Cada cubo es una iteración.
Algunas eran ajustes grandes (rd llegó a 38.5), otras micro-correcciones
de décimas de milímetro.
21 cubos, 21 iteraciones. Cada color es un intento diferente.
La torre de cubos es mi recordatorio visual de que la impresión 3D es
iterativa. No sale perfecto a la primera, pero cada intento
te acerca un poco más. Y tenerlos apilados en la mesa es extrañamente satisfactorio.
Verifica el mapeo de ejes primero. Antes de imprimir un cubo, confirma que los ejes de OrcaSlicer coinciden con la impresora. Imprime una flecha para verificar.
No confíes en el primer cubo. Siempre imprime al menos 2 para confirmar.
Mide siempre en el mismo punto (centro de cada cara).
El pie de rey digital es esencial. Mejor inversión de 15€.
Documenta cada iteración. rd anterior, medida, rd nuevo. Sino perderás la cuenta.
La paciencia paga. 21 cubos parecen muchos, pero ahora cualquier pieza sale con las medidas correctas desde la primera capa.
💡 Tip: Guarda un cubo de calibración de referencia. Si algo cambia (nozzle, correa, temperatura), imprimes uno y sabrás al instante si necesitas re-calibrar.
💬 Comentarios